Replacing a vented hot water cylinder
Introduction
Replacing a hot water cylinder is not a particularly common DIY task, however if yours has sprung a leak or if you need a larger one for whatever reason, then it can be as straightforward as removing one and inserting another.
If you are in any doubt as to your abilities to successfully get the job done then it is highly recommended to consult a plumber. If you realise during the job that you can't finish then you and your family could be without hot water for some time if you're not lucky.
Choosing a new cylinder
If your current vented cylinder is leaking, damaged, or you feel its old and time for a new one, then replacing like-for-like with a new cylinder is a straightforward task.
If however you are considering a larger vented cylinder, or a combination vented hot water system, then first of all make sure you have sufficient space in the existing location to comfortably fit the new cylinder. Most airing cupboards are built around the size of the cylinder when the house is built, as such you'll probably find that a larger cylinder will not fit in the current space.
- If the new cylinder needs to be fitted in a different location then it's a good idea to consult a plumber if you are at all unsure as to your skills in plumbing in a new system.
When purchasing a new cylinder it's a good idea to buy one that is pre-insulated, it will be slightly more expensive but worth it in the long run. Make sure it carries a kitemark, as this means it will meet BS:1566 and comply with the latest building regulations for energy conservation.
- If you are thinking of installing an unvented hot water storage system, or a thermal store hot water cylinder, you must consult a professional installer as these are not jobs for a DIYer.
Tools for the job
- Adjustable Wrench
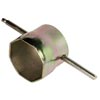
- Immersion spanner
- PTFE tape

Removing the old cylinder
Before commencing work removing the cylinder, you must first isolate the cylinder within the plumbing system and drain it thoroughly.
- Turn off the cold water supply to the cylinder, either by isolating the cold water storage tank or by turning off the mains water and draining the cold water tank.
- If applicable, switch off the mains electricity for the property, and disconnect the immersion heater from the mains electrical supply.
- Drain the hot water cylinder via the draincock at its base.
For more on draining the hot and cold supply, use the following link:
When dismantling the pipework to the cylinder, make a note of where the plumbing fixtures currently sit, as this will help considerably when connecting the new cistern. If necessary write a description on each of the pipes using a pen and masking tape.
- Disconnect all the pipework to the cylinder, and if possible fasten them out of the way.
- If the joints are stiff use a little penetrating oil to loosen them (WD40 or similar).
- Lift the cylinder out of the cupboard and remove it to a safe location.
- Take this opportunity to inspect all the pipework for signs of wear, and to clear the cupboard space of debris if necessary.
- This is now an ideal opportunity to add a gate valve to the outlet pipe to allow one to be able to easily isolate the hot water cylinder in the future, as opposed to having to drain it.
Once the old tank has been removed, ensure that the base is firm enough and large enough for the new tank to sit on. If necessary construct a new platform busing 18mm (¾in) plywood.
Installing the new cylinder
Place the new cylinder in position and ensure it sits firmly on it's base. Once you are happy with it's position you can set about connecting the pipes and fittings.
- If necessary modify the existing pipes to ensure they fit correctly to the new cylinder.
- Make connections using PTFE tape to ensure the threaded joints are watertight.
- Fit a draincock to the feedpipe to the tank (from the cold water storage tank above), if one isn't there already.
- Re-install the immersion heater, ensuring to wrap PTFE tape around the thread to ensure a snug fit.
- Re-connect the immersion to the electrical supply.
- Re-fill the cylinder, checking thoroughly for leaks.
- Once you are happy, fire up your boiler and heat the water in the cylinder. Check periodically for leaks as the cylinder heats up.
Further information and useful links
- Choosing a hot water storage cylinder
- Replacing a cold water storage tank
- Hot water systems
- Choosing a new boiler
- More plumbing & heating topics
- Find a Plumbing Merchants near you
- Find a Plumber near you
- Find a Heating Engineer near you
Site Pages
Featured Articles


